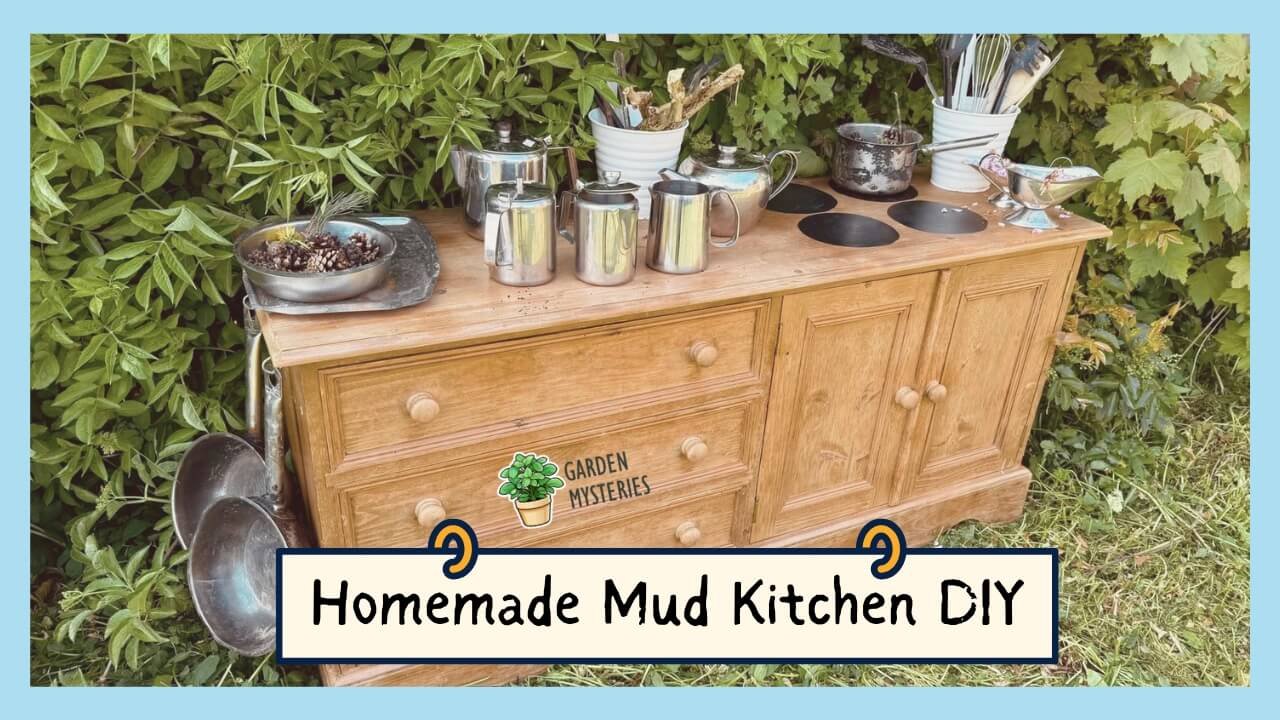
A homemade mud kitchen DIY is a small outdoor play station where kids mix soil, water, and leaves the same way they’d cook in a real kitchen. It costs little, and a weekend is usually enough to finish one from an old table or pallet.
Most parents get stuck at the planning stage. Online guides mix pallet builds, table conversions, and store-bought kits together, and the confusion usually comes down to budget and space.
I built one last spring with leftover pallet wood and a secondhand mixing bowl, and this guide covers exactly what worked, what I’d change, and what it cost. Materials, steps, safety, and a few upgrades are all below.
Key Takeaways
- Pallets, scrap wood, or an old table can form the base.
- A removable metal bowl works better than a fixed sink.
- Sand every edge well since children lean and reach constantly.
- Budget builds can cost under thirty dollars using reclaimed wood.
- Stable footing and afternoon shade matter more than fancy details.
- Natural materials like leaves and petals replace store-bought ingredients.
What Is a Homemade Mud Kitchen?
A homemade mud kitchen is an outdoor pretend play station built for mixing natural materials like soil, water, and leaves. Kids use old pots, spoons, and bowls as tools, turning backyard clutter into imaginative recipes and games.
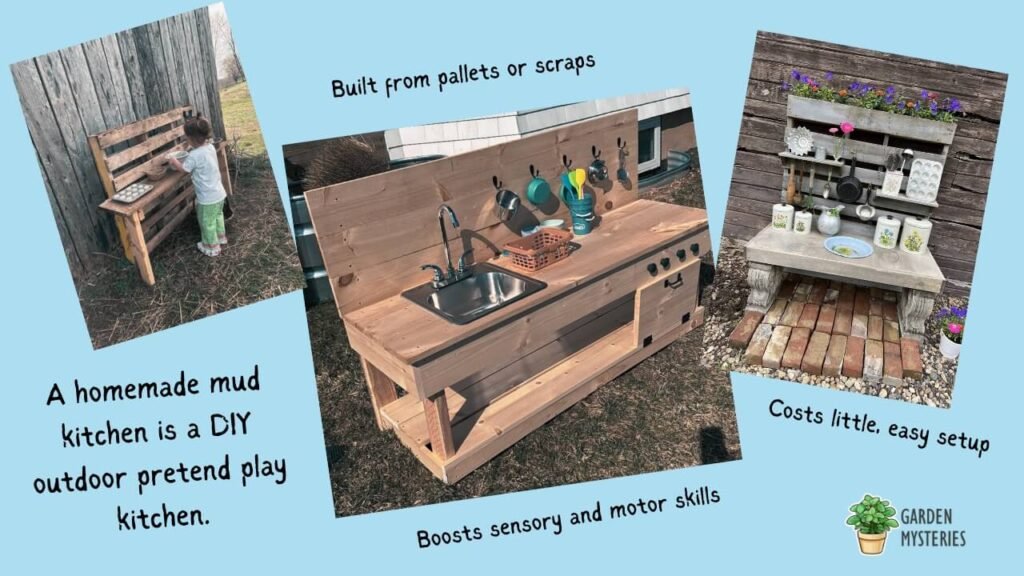
Instead of pretend food, children work with real textures here. Sand, pinecones, petals, and small stones become the ingredients, and that hands-on contact is part of why the play holds attention so long.
A mud kitchen diy build doesn’t need to copy a store-bought kit at all. Ours started as a wobbly pallet with a bowl jammed into a rough hole, and it still gets used almost every single day.
Why build one at all? A few reasons kept coming up once ours was finished:
- It gives kids hours of screen-free play while building fine motor skills through pouring, scooping, and mixing.
- Sensory play with soil and water helps younger children develop focus and calm during outdoor free time.
- It keeps messy play contained to one corner of the yard instead of spreading across the whole garden.
- Building it together becomes a small family project, and ours turned into a weekend my son still brings up.
Materials You Need to Make a Homemade Mud Kitchen (Most You Already Have)
The materials for this build are simple. You need a sturdy base, a worktop, a removable bowl, a few basic tools, and old kitchen items sitting unused in a cupboard.
- Pallet or scrap wood: forms the base frame, and one solid pallet is usually enough for a small kitchen.
- Worktop board: sits across the top, and cedar or treated pine holds up better outdoors than soft plywood.
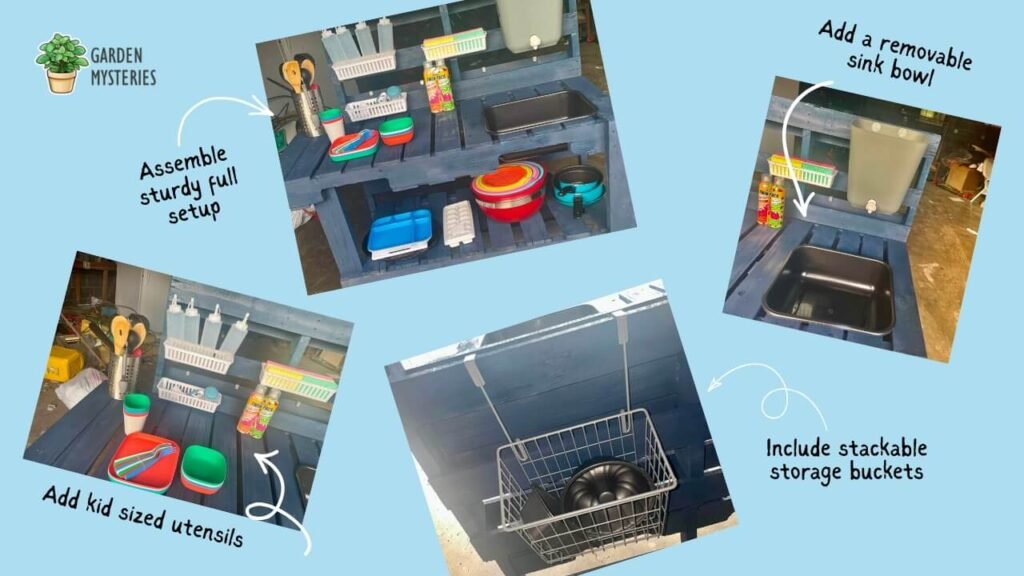
- Metal mixing bowl: works as a removable sink, lifting out easily for cleaning after a messy session.
- Wood screws and brackets: hold the shelf, backsplash, and worktop together so nothing wobbles under regular use.
- Cordless drill and jigsaw: cut the bowl opening and secure the frame, so borrowing a set saves buying new.
- Sandpaper and safety glasses: smooth every edge, and glasses protect eyes while sanding or drilling near the face.
If your yard is small, some of the same space-saving tricks from balcony gardening tips can help you fit a kitchen into a tight corner.
How to Make a Homemade Mud Kitchen: Step-by-Step Build Instructions
Many busy parents buy a full set of mud kitchen. However, the best idea is to make it yourself with your kids, and that makes it even more exciting. Building one comes down to five stages: picking a spot, building the frame, cutting the sink hole, adding storage, and finishing the surface. None need advanced woodworking skills, just patience.
Step 1: Choose a Garden-Friendly Location
I placed ours under a tree, and that single choice saved us on hot afternoons. Look for good drainage, since water and soil will end up on the ground regardless of how careful the kids are.
Leave enough clearance so nearby plants and paths stay untouched during play.
Step 2: Build the Frame with Pallets
A diy homemade mud kitchen with pallets starts with checking every board for cracks or loose nails first. We reinforced two weak boards on ours with extra screws, and that quick fix has held for well over a year.
A short checklist helped us avoid mistakes here:
- Inspect each board for splinters, rot, or protruding nails
- Reinforce weak joints with extra screws before moving on
- Sand every exposed edge before attaching the worktop
Step 3: Cut the Sink Opening
Trace the bowl upside down onto the worktop, then mark a slightly smaller circle inside. Cut with a jigsaw so the rim rests on the wood while the bowl hangs below it.
A removable bowl beats a glued-in basin. Ours comes out for cleaning and swaps easily whenever it gets a dent.
Step 4: Add a Shelf & Backsplash
Our diy pallet mud kitchen got its lower shelf from a second pallet, split apart with a crowbar. It took extra time, but the storage now holds every pot, tray, and funnel we own.
A vertical board behind the worktop works as a simple backsplash and gives the whole build a more finished look.
Step 5: Finish the Surface & Add Hooks
Sand the whole structure once more, then paint a few circles for pretend stove burners if you want that detail. Add cup hooks along the backsplash for spoons and lightweight utensils.
Safety and Placement Tips With a Homemade Mud Kitchen
Safety mostly comes down to stable footing, smooth edges, and keeping chemicals well away from the play zone. A little prep work before the first use prevents most problems later.
Check Stability Before First Use
Push against the frame from every side before letting kids near it. Ours needed one extra brace on the back leg after a wobble test.
Smooth Every Rough Edge
Children lean, climb, and reach across this structure constantly during play. Run your hand along every surface after sanding, and go back over any spot that still catches or feels rough.
Keep Tools Separate from the Play Area
Drills, jigsaws, and loose screws should never sit near the finished kitchen once construction wraps up. We store ours in a shed across the yard.
Watch Water Depth for Younger Toddlers
A shallow bowl works better than a deep one for children under three. We keep water topped up from a jug rather than a hose, which also limits depth.
Keep Garden products well away
Fertilizer and plant food should stay far from the play area. If you use something like Miracle-Gro on Seedlings nearby, store it in a locked shed rather than an open shelf.
Homemade Mud Kitchen DIY: Fun Add-Ons and Upgrades
Once the basic build of your homemade mud kitchen DIY is finished, a few small extras can stretch the play value considerably. None of these upgrades require rebuilding anything from scratch.
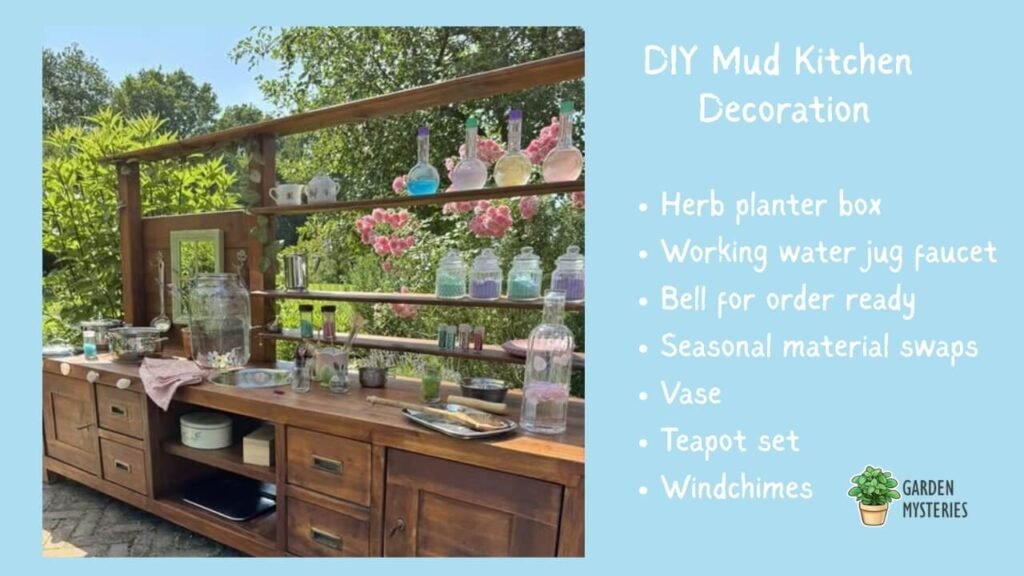
- Chalkboard menu board: A small chalkboard panel screwed to the backsplash lets kids write pretend menus or draw their daily specials. Ours gets erased and rewritten almost every single afternoon.
- Herb planter box: A narrow planter attached to one side gives kids real herbs to pick for their recipes. Mint and basil held up well through a full summer of picking.
- Working water jug faucet: A jug with a small spigot, mounted above the bowl, mimics a running tap without any real plumbing involved. It’s one of the simplest upgrades and probably the most used feature we added.
- Bell for order ready: A small bell screwed near the worktop lets kids signal when a pretend order is finished cooking. It sounds silly, but ours gets rung constantly.
- Seasonal material swaps: An outdoor mud kitchen diy setup changes naturally with the seasons. Petals and herbs suit spring, water and sand fit summer, and fallen leaves take over once autumn arrives.
How Much Does a DIY Mud Kitchen Cost?
Cost depends heavily on how much you already own versus what you need to buy new. Here’s roughly what ours added up to:
- Pallet or scrap wood: free to 15 dollars if bought secondhand
- Metal mixing bowl: 5 to 10 dollars from a thrift store
- Screws, brackets, and hooks: around 8 dollars total
- Sandpaper and paint: 5 dollars for a basic finish
- Total: Approximately $30 to $40
Our full build came in under thirty dollars, mostly because the pallet and bowl were free. If you’re also budgeting for nearby garden beds, comparing prices across best garden fertilizers helps you plan the whole yard at once.
FAQs
Does a mud kitchen need a roof or cover?
Not strictly, but a small overhang or nearby tree helps protect the wood from constant rain and extends how long the build lasts outdoors.
How long does a homemade mud kitchen typically last?
With regular sanding and the odd screw tightened, ours has held up for over a year outside, and I expect a few more seasons from it.
Can a mud kitchen be moved once it’s built?
Yes, if you keep it lightweight and skip permanent ground anchors. Ours gets shifted twice a year to chase shade as the sun angle changes.
What happens to leftover soil and leaves after play?
Most of it can go straight back into the garden or a compost bin. If you’re unsure what belongs there, a piece like can you compost vinegar covers some of the trickier composting questions.
Final Thoughts
A homemade mud kitchen DIY doesn’t need to be fancy to earn its keep. Ours started as scrap wood and a secondhand bowl, and it’s still the first thing my kids run to outside.
Start small, build in stages if money is tight, and let the garden itself supply most of the fun. A few muddy fingerprints usually mean it’s working exactly as planned.
Disclaimer: This article may contain affiliate links and advertisements. We may earn a commission from qualifying purchases at no extra cost to you. Recommendations remain independent.